Foobar2000 ~ Playlists & Autoplaylists


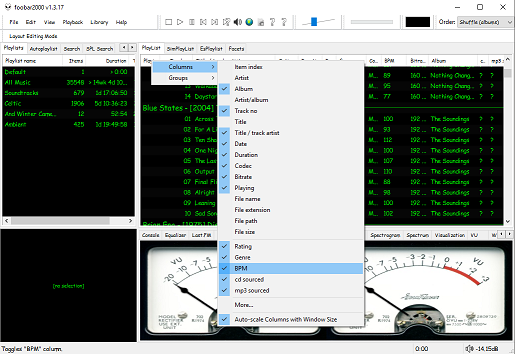
Playlists, or named lists of songs, are an essential aspect of Foobar2000. Whenever you add a song to Foobar, you are adding it to one of Foobar’s playlists. Foobar allows you to create and maintain different playlists, which are just entitled lists of your audio tracks (files). The playlists link to audio files in a ‘many to one’ relationship; that is, there can be many tracks on different playlists that reference the same audio track. Foobar can import and exports playlists in a variety of formats; and stores its own playlists as .fpl files. (This is different from adding a song to your Foobar2000 Library).

Playlists can be created manually by adding individual songs, or automatically by specifying a set of conditions in a query with the result displayed as an “Autoplaylist”. Manually created playlists are static, they don’t change unless you change them; Autoplaylists are dynamic, that is the results may change whenever the Autoplaylist is queried.

Playlists created manually can be edited directly, while Autoplaylists are edited by modifying the query. However, you can save the results of an Autoplaylist as a new static, and therefore editable, playlist.

Creating an Autoplaylist of an Albumlist item like genre:

  1. Select by genre from the Albumlist view selector
  2. Select a genre from the list of genres
  3. Right click that selected genre and select Create Autoplaylist

You will now have a new Autoplaylist listed on the playlist manager tab with the name of the genre you selected. Playlists created this way are called an Album List branch.

Creating an Autoplaylist of a folder’s contents:

  1. Select the Search tab
  2. enter %path% HAS replace this with the actual path  in the search field
  3. Select ...
  4. Select Create Autoplaylist
  5. Rename the new playlist (hint, with the path)

AutoPlaylist query examples:

  • Lossless ~ “$info(encoding)” IS lossless
  • Lossy ~ “$info(encoding)” IS lossy
  • Missing title ~ title MISSING (no percent signs)
  • Missing genre ~ genre MISSING
  • Never played ~ %play_count% MISSING
  • No Dynamic Range info ~ %dynamic_range_album% MISSING
  • No ReplayGain info ~ %replaygain_track_gain% MISSING
  • No Artist info ~ %path% HAS album AND album artist MISSING
  • Played often ~ %play_count% GREATER 9
  • Randomly sorted ~ ALL SORT BY “$rand()”
  • Recently added ~ %added% DURING LAST 1 WEEKS
  • Recently played ~ %last_played% DURING LAST 1 WEEK
  • Recently modified ~ %last_modified% DURING LAST 2 WEEKS

Foobar Playlist Management Components:

Additional resources:

Building Autoplaylist queries ~ Foobar2000: Query Syntax
Formatting playlist contents ~ Title Formatting Introduction
Adding Playlist Headers ~ Playlist Grouping Schemes

Last.fm ~ Scrobblers


Last.fm is a web service that scrobbles, or tracks and publishes, your music profile and listening history.

Download software to scrobble from anywhere and from any service.

Official:
Last.fm
Github

Android:
github.com/simple-last-fm-scrobbler

Browser plugins:
Last.fm scrobbler for Chrome
scroblr.fm

Cross-platform:

github.com/kawaiiDango/pano-scrobbler
github.com/dumbie/ZuseMe

Foobar2000:
github.com/gix/foo_scrobble ~ newer
github.com/zfoxer/foo_scrobbler_mac
www.foobar2000.org/components/view/foo_audioscrobbler

Web:

openscrobbler.com
universalscrobbler.com

foo_audioscrobbler ~ Foobar2000 & Last.fm


Last.fm is a web service that maintains a history of what you’ve listened to. You’ll need a Last.fm account and a player that can scrobble. Scrobbling is uploading the artist’s name and song title of your currently playing track to Last.fm’s server. foo_audioscobbler allows Foobar to keep your Last.fm profile current.

  • It replaces the Last.fm client application.
  • It supports the current submission protocol.
  • It sends “now playing” notifications to your Last.fm profile.

Optionally, it can import played tracks from your iPod via the foo_dop component.

After you install foo_audioscrobbler, you’ll need to log into your Last.fm account in Foobar’s Preferences menu.

Capture - Foobar - prefs - audioscrobbler

www.mp3tag.de/en/fb2k
www.foobar2000.org/components/view/foo_audioscrobbler
Last.fm
My Last.fm profile

Alternative Scrobbler ~ github.com/gix/foo_scrobble/releases

foo_verifier ~ Foobar Audio File Verifier


Checks specified media files for decoding errors. Note that with most formats, its accuracy is limited to detecting errors that abort the decoding process.

Capture_foo_verifier_results
Website
Documentation

After installing this Foobar plugin, you’ll have two new menu choices under the right mouse click context menu: Utilities > Verify integrity and Utilities > Verify album with Accuraterip

It’s also possible to see more information if you go to File > Preferences > Advanced > Tools > File Integrity Verifier and enable Verbose AccurateRip Output

Boom Audio Player ~ Foobar2000 Simplified


Frome the same developer who brought you Foobar2000 comes Boom.

Boom is an easy to use audio player intended for casual computer users who do not wish to spend their time on figuring more sophisticated software out. All of its most important features are easily accessible out-of-the-box.

Features:

  • No installation or administrator rights required! Just download and run.
  • Gapless playback of properly encoded files. Enjoy smooth transitions between tracks.
  • ReplayGain support. External software is currently required to write ReplayGain information to file tags to utilize this functionality.
  • Contents of your music folders are shown, in a convenient structured genre/artist/album/song view.
  • By default, contents of “my music” folder or Windows Music library folders are shown. You can configure Boom to index music from any other folders though.
  • You can install Boom to removable media and have it index contents of the folder it is installed in.
  • Are your files badly tagged or missing tags all together? No problem, Boom can browse your music library by its folder structure.
  • Supports variety of popular audio formats, including: MP3, Ogg Vorbis, FLAC, Musepack (MPC), WavPack, WAV, AIFF, MP4/M4A, WMA.
  • For emergency tagging needs, Boom includes a simplified version of the foobar2000 Properties dialog.
  • Easily configured to run from removable media.
  • Multi-language support.
boom-1

perkele.cc/software/boom
apps.microsoft.com/detail/9NQNS46R8T75

foo_playcount ~ Foobar2000 Playback Stats


You can extend Foobar2000 functionality by increasing the information the player maintains. Installing the foo_playcount component allows Foobar to both keep track of additional data, and adds the following user available fields:

  • Date and time a track was first played ~ %first_played%
  • Date and time a track was last played ~ %last_played%
  • The number of times a track has been played ~ %play_count%
  • Date and time a track was first added to the Media Library ~ %added%
  • Song rating ~ %rating%

Song Rating Playlist Display

The songs rating can now be displayed in a playlist viewer in two ways:

  • On a 1 to 5 scale with %rating%
  • Displayed as up to five stars, “★★★”, with %rating_stars%
  • Displayed as five stars, “★★★☆☆”, with %rating_stars_fixed%

Note: This component should be installed at the same time as Foobar2000, if your goal is to have a complete play count history.

Discussion
Download
Documentation
Display (Title) Formattingplaylist viewer

foo_playcount_2003

This component uses the same database backend that foo_playcount utilises for logging plays but has many more advanced features and fewer limitations.

  • Playcounts and dates can edited for any context menu selection.
  • Data can be imported from file tags or fields provided by other components.
  • Ratings up to 10 are supported.
  • You can customise how long you have to listen before a play count is incremented.
  • The current time is available via title formatting as a full date time string or Unix timestamp.
  • First played, last played and added are all available as Unix timestamps.
  • How records are bound to tracks can be configured in the Advanced Preferences.

marc2k3.github.io/component/playcount-2003

Foobar2000 ~ Playing CDs With Pre-emphasis


Pre-emphasis & CDs

Although rarely used, there exists the capability for standardized emphasis in Red Book CD mastering. As CDs were intended to work on 14-bit audio, a specification for ‘pre-emphasis’ was included to compensate for quantization noise. After production spec was set at 16 bits, quantization noise became less of a concern, but emphasis remained an option through standards revisions. The pre-emphasis is described as a first-order filter with a gain of 10 dB (at 20 dB/decade) and time constants 50 μs and 15 μs ~ http://en.wikipedia.org/wiki/Emphasis_(telecommunications)#Red_Book_Audio

Emphasis came about because of early converter design. The entire sampling process was new, and A to D converters exhibited low level noise because of bad linearity in the conversion process. This process added some high frequency broadband noise to the digital signal. Manufacturers overcame this byproduct by boosting (emphasis) the high frequencies during the conversion from analog to digital, and then rolling off (de-emphasis) the high frequencies by the same amount after the conversion back from digital to analog. This process was optional and there was a switch to select emphasis on each track during record. A flag was set in the digital bit-stream, which automatically activated de-emphasis during playback. All CD players, DVD players, and DAT machines detect this flag and turn on a high frequency roll-off in the analog domain during playback. If the digital signal contains emphasis and the flag is missing or turned off, then the roll-off does not occur and the audio will be brighter than normal.

This emphasis feature was the biggest reason why different CD players sounded different when playing back the same CD, or DAT machines differed playing back the same DAT tape. The digital part and the conversion to analog were basically the same in all of the machines. The de-emphasis circuit was implemented in the analog domain using the least expensive circuit to perform the operation. There was high-end EQ on the output of every digital playback device, and there was no standard or calibration for how it was performed. If you played back a CD without emphasis, then all of the CD players sounded pretty much the same. If you played a CD with emphasis, then each playback device sounded very different from every other player.

Producers and engineers started turning off the emphasis switches. Converters were getting better so there was less converter noise, and the use of de-emphasis circuits was eliminated. ~ Roger Nicolls

As I understand it, the Redbook CD standard calls for decoding of pre-emphasis flags. So any player bearing the CD format logo should handle pre-emphasis discs properly. ~ http://forums.stevehoffman.tv/threads/whats-pre-emphasis.49396/#post-971902

Working with CDs with pre-emphasis

Foobar plugins to de-emphasis pre-emphasized CDs:

  • Postprocessing (foo_deemph): works only with lossless sources; always active during playback and ReplayGain scan.
  • * DSP plugin (foo_dsp_deemph): works with any source

Download ~ http://wiki.hydrogenaud.io/index.php?title=Pre-emphasis

Use post-processing if you want to add correct ReplayGain tags to your files.
Use DSP if you have lossy files that you want to de-emphasize.
Otherwise, there’s no difference. ~ http://hydrogenaud.io/index.php/topic,99394.50.html

Lists of CD’s with pre-emphasis:

http://www.studio-nibble.com/cd/index.php?title=Pre-emphasis_(release_list)
http://www.discogs.com/lists/CDs-with-pre-emphasis-my-collection-only/243100
http://www.discogs.com/lists/CDs-suspected-to-have-pre-emphasis/308012

foo_plorg ~ Playlist Organizer With Folders


The Foobar2000 Playlist Organizer component allows playlists to be organized into folders.

  1. Install the foo_plorg component
  2. Add a new panel or tab, then add Playlist Organizer

capture-foobar2000-dui-foo_plorg

Importing playlists using foo_plorg and foo_playlist_revive

  1. Install foo_playlist_revive
  2. Drag playlist files and drop on the Playlist Organizer panel
  3. Select Edit > Revive Dead Items

Note: The imported playlist will have the same name as the original playlist filename.

Resources:

Website
Documentation – Hydrogenaudio
foo_playlist_revive – Hydrogenaudio
Foobar2000 – How to install a component

foo_discogs ~ Foobar2000 & Discogs


Greatly extend the information in your music files by using the foo_discogs component to tag albums with Discogs information. Once the additional Discogs release information is stored in the song tags, it’s possible to search for catalog numbers, secondary artists or studios, etc. You can now also create toolbar buttons which open the corresponding artist or release pages in Discogs, the artist’s own website or other links.

  • download Discogs album and artist artwork
  • retrieve more information than most taggers
  • goes that extra length to make sure retrieved data is correct and well formatted
  • flexible tag mapping allows you to write only what you want, where you want
  • use meta-data in tags to display Discogs artist / label / release web pages
    able to later update specified tags (useful in update ratings)
foobar - foo_discogs - resulting tags

Album’s properties when tagged with Discogs info

Installing & Configuration:

  1. Install the foo_discogs component
  2. Select any song on any playlist
  3. Right click the song and select Tagging
  4. From the sub-menu select Discogs
  5. Now select Configuration
  6. Change any settings needed.

Tagging Files:

  1. Select an entire album on a playlist
  2. Right click the album and select Tagging
  3. Select Discogs
  4. Select Write Tags…
  5. Click Search then select the correct match and click Next
  6. Confirm that the tracks match the files and click Write tags

Your audio files should now be tagged with additional Discogs metadata.

Open Release Page Button:

  1. Right click on Foobar’s Toolbar area and select “Customise Buttons…
  2. In “Available Commands” navigate to and select [context] > Tagging > Discogs > View Release Page
  3. Change Icon and then click “OK
  4. Select a song,  or album that has been tagged with Discogs metadata, and click the new custom button

References:

www.foobar2000.org/components/view/foo_discogs
hydrogenaud.io/index.php/topic,50523.0.html

Latest update:

github.com/ghDaYuYu/foo_discogs
bitbucket.org/fooDaYuyu/foo_discogs/downloads/

Foobar2000 ~ Playlist Viewers


Foobar2000 Playlist Viewers display the current playlist of songs. Different playlist viewers offer various capabilities such as formatting, grouping and visual options. A playlist viewer is usually the central panel and main focus of a Foobar2000 interface. Foobar2000 plays the next song of the current playlist unless the play order has been changed from default, to repeat, random or shuffle. There is a playback queue but it is not visible or used in normal operation.

foobar2000-simplaylist-groups-v1
SimPlaylist

Adding a custom column to a playlist view: (using play count as an example)

  • When adding a column view in a playlist, you’ll need to define the column first.
  • Navigate to Preferences > Display > Default User Interface > Playlist View > Custom Columns
  • at the bottom of the custom columns windows, click “Add new
  • Name the Column “Played‘ and %play_count% as the ‘pattern’
  • click apply, ok
  • Now right click the title bar of the playlist and select “Columns” and make sure ‘Played‘ is selected (checkmarked) and that you can see the column in the playlist, it will be last but you can rearrange it.

Resources:

Configuring the default playlist viewer

ReplayGain ~ Advanced Volume Normalization


ReplayGain is … a technique invented to achieve the same perceived playback loudness of audio files. ~ Hydrogenaudio Knowledgebase

ReplayGain … allows players to normalize loudness for individual tracks or albums. This avoids the common problem of having to manually adjust volume levels between tracks when playing audio files from albums that have been mastered at different loudness levels. ~ en.wikipedia.org/wiki/ReplayGain

If you’re using track gain, every song is played at 89 dB; no song is any louder than any other. If you’re using album gain, tracks will be played at 89 dB plus or minus a few dB, depending on how much louder or quieter each track is relative to the other tracks on the album. By definition, album gain is not going to make all tracks as loud as possible; the quieter tracks are going to remain that much quieter than the louder tracks, and they’ll average out to 89. ~ Hydrogen Audio

Using ReplayGain in Foobar

(1) First set the ReplayGain target values:

Preferences / Playback / ReplayGain
Source mode: by playback order
Processing: apply gain and prevent clipping according to peak

Foobar2000 Preferences - Playback
Foobar2000 Preferences – Playback – ReplayGain

Recommended Values:

Set Preferences / Preamp / Without RG values: to around -8.0 db

If you are also playing tracks which aren’t RG-tagged, they’ll be playing quite loud in comparison to the RG-tagged ones. To mitigate that, you can set the “Without RG info” Preamp level to, say, -11.9. This will make the player pretend they have -11.9 dB album gain. Thus if you played a non-RG-tagged copy of that loudest track, it would be played at 89 dB instead of its natural 100.91 dB, and would thus match the level that all the RG-tagged tracks are played at. However, then the quieter non-RG-tagged tracks would still be that much quieter. So you may find -8 or so to be a better “without RG info” preamp level, on average.~ HA Forum

I usually set my non-RG preamp to somewhere in the range of -7.0 dB to -9.0 dB. ~ HA Forum

I recommend setting the slider labelled “Without RG info” to -8.0 (that’s minus eight) or less. ~ www.bobulous.org.uk/misc/Replay-Gain

If you listen to modern music -7dB/-10dB value should be correct. If you listen to older music, keep the value a bit lower because the average level of recently released tracks are higher. ~ eolindel.free.fr/foobar0.9/Replaygain

(2) Next scan files:

  • Select Files / Right mouse / ReplayGain / Scan selection as single album (adds album and track ReplayGain tags)
Context - ReplayGain
ReplayGain - Scanning - small

Once the files are scanned, they can be played.

True Peak Scanner

The foo_truepeak component scans ReplayGain, Dynamic Range, LUFS, PLR RMS values, etc.

Foobar ReplayGain Override Component

For older versions that lack the “by playback order” option, this component provides a way to specify which ReplayGain modes to use for each playback order. Track gain is probably desirable for random playback while with regular playback album gain is more suitable.

Preferences - ReplayGain override.PNG
Download ~ www.foobar2000.org/components/view/foo_rg_trn

Alternative ReplayGain

Alternative ReplayGain engine. Should be faster as it does not use FFT.

www.foobar2000.org/components/view/foo_arg

ReplayGain in Linux

www.bobulous.org.uk

ReplayGain in Winamp

WinAmp’s use of these RG tags is enabled / disabled via the General Preferences – Playback – Replay Gain options ~ forums.winamp.com/showthread.php?t=345520

ReplayGain DLL

Win32 dll to normalize wav pcm files using replaygain

sourceforge.net/projects/rspgain

Foobar2000 DSP Plugin:

foo_dsp_replaygain ~ Temporary Replaygain

Additional References:

wiki.hydrogenaud.io/index.php?title=ReplayGain
wiki.hydrogenaud.io/index.php?title=ReplayGain_1.0_specification
replaygain.hydrogenaud.io/proposal/index.html
replaygain.hydrogenaud.io/proposal/calibration.html
www.hydrogenaud.io/forums/index.php?showtopic=96391
www.hydrogenaud.io/forums/index.php?showtopic=35255
www.techspot.com/tweaks/foobar/index
stephan.win31.de/music.htm#rg-levels

Track Gain (relative to the ReplayGain target volume)
[%replaygain_track_gain%]

ReplayGain’s Track Volume
$if(%replaygain_track_gain%,$puts(X,$sub(8900,$replace(%replaygain_track_gain%,.,)))$ifgreater($get(X),9999,$substr($get(X),1,3).$substr($get(X),4,5),$substr($get(X),1,2).$substr($get(X),3,4)) dB))

Track Volume (-18dB is equivalent to the ReplayGain target volume of 89dB)
$if(%replaygain_track_gain%,$puts(X,$sub(-1800,$replace(%replaygain_track_gain%,.,)))$ifequal($get(X),0,0,$ifgreater($get(X),0,$replace(+$substr($num($get(X),4),1,2),+0,+),$replace($substr($num($get(X),5),1,3),-0,-))).$substr($num($get(X),5),4,5) dB)

Album Gain (relative to the ReplayGain target volume)
[%replaygain_album_gain%]

ReplayGain’s Album Volume
$if(%replaygain_album_gain%,$puts(X,$sub(8900,$replace(%replaygain_album_gain%,.,)))$ifgreater($get(X),9999,$substr($get(X),1,3).$substr($get(X),4,5),$substr($get(X),1,2).$substr($get(X),3,4)) dB))

Album Volume (-18dB is equivalent to the ReplayGain target volume of 89dB)
$if(%replaygain_album_gain%,$puts(X,$sub(-1800,$replace(%replaygain_album_gain%,.,)))$ifequal($get(X),0,0,$ifgreater($get(X),0,$replace(+$substr($num($get(X),4),1,2),+0,+),$replace($substr($num($get(X),5),1,3),-0,-))).$substr($num($get(X),5),4,5) dB)

Track Peak
[%replaygain_track_peak_db%]

hydrogenaud.io/index.php?topic=121273.msg1000424#msg1000424

Foobar2000 Tagging ~ Fixing Swapped Artist | Title Tag Info


Do you have albums where the artist’s names are in the track title field, and the title of the track is in the artist name field? Here’s how to fix this.

Reversed artist - track title - playlist

Start by checking the file names. If the file names have both artist name and track title information, then the fix is easy, just retag the files using the Automatically fill values function.

First, select the files, then open the Properties dialog window.

Reversed artist - track title - properties

Right click and select Automatically Fill Values…

Automatically fill values

Then with the source set to File names, fill in or select a Pattern which puts the information in the correct fields.

Reversed artist - track title - auto fill values.PNG

After you select Ok, Foobar will retag the files properly.

Reversed artist - track title - properties - fixed.PNG

However, if the file names don’t contain both artist names and track title information, you’ll have to rename the files from the tags first. Select the files then right click and select File Operations>Rename

Reversed artist - track title - rename.PNG

and  after the files have been renamed, carry out the rest of the above procedure.