This is an updated biography script that works in the 32bit Spider Monkey Javascript panel. This won’t work in 64bit Foobar2000 installations.
Spider Monkey Panel ~ github.com/TheQwertiest/foo_spider_monkey_panel
Biography Script: The most recent version of the script is on, or near, the last page of this discussion. ~ hydrogenaud.io/index.php/topic,112913.0.html
- Download and install foo_spider_monkey_panel
- Download and unzip the newest version of the Biography script
- In Foobar2000 select “View > Layout > Enable Layout Editing Mode“
- Add a new panel or tab to your Foobar interface
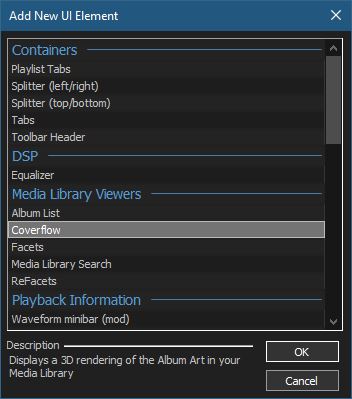
- Right click in the new area and select “Add New UI Element…“
- Select “Spider Monkey Panel” in the Utility section
- You should now see a blank Spider Monkey panel and the message “Click here to open editor.“
- Click on the panel to open the editor and click the “Files” button and select “Import” and navigate to the biography script folder, select the script file “biography.x.x.x.js” and click “Open“
- Click “Apply” and click “Ok“
- Rename the Tab
- Disable “Layout editing mode” in the “View” menu
Forum Discussion:
hydrogenaud.io/index.php/topic,112914.msg929674