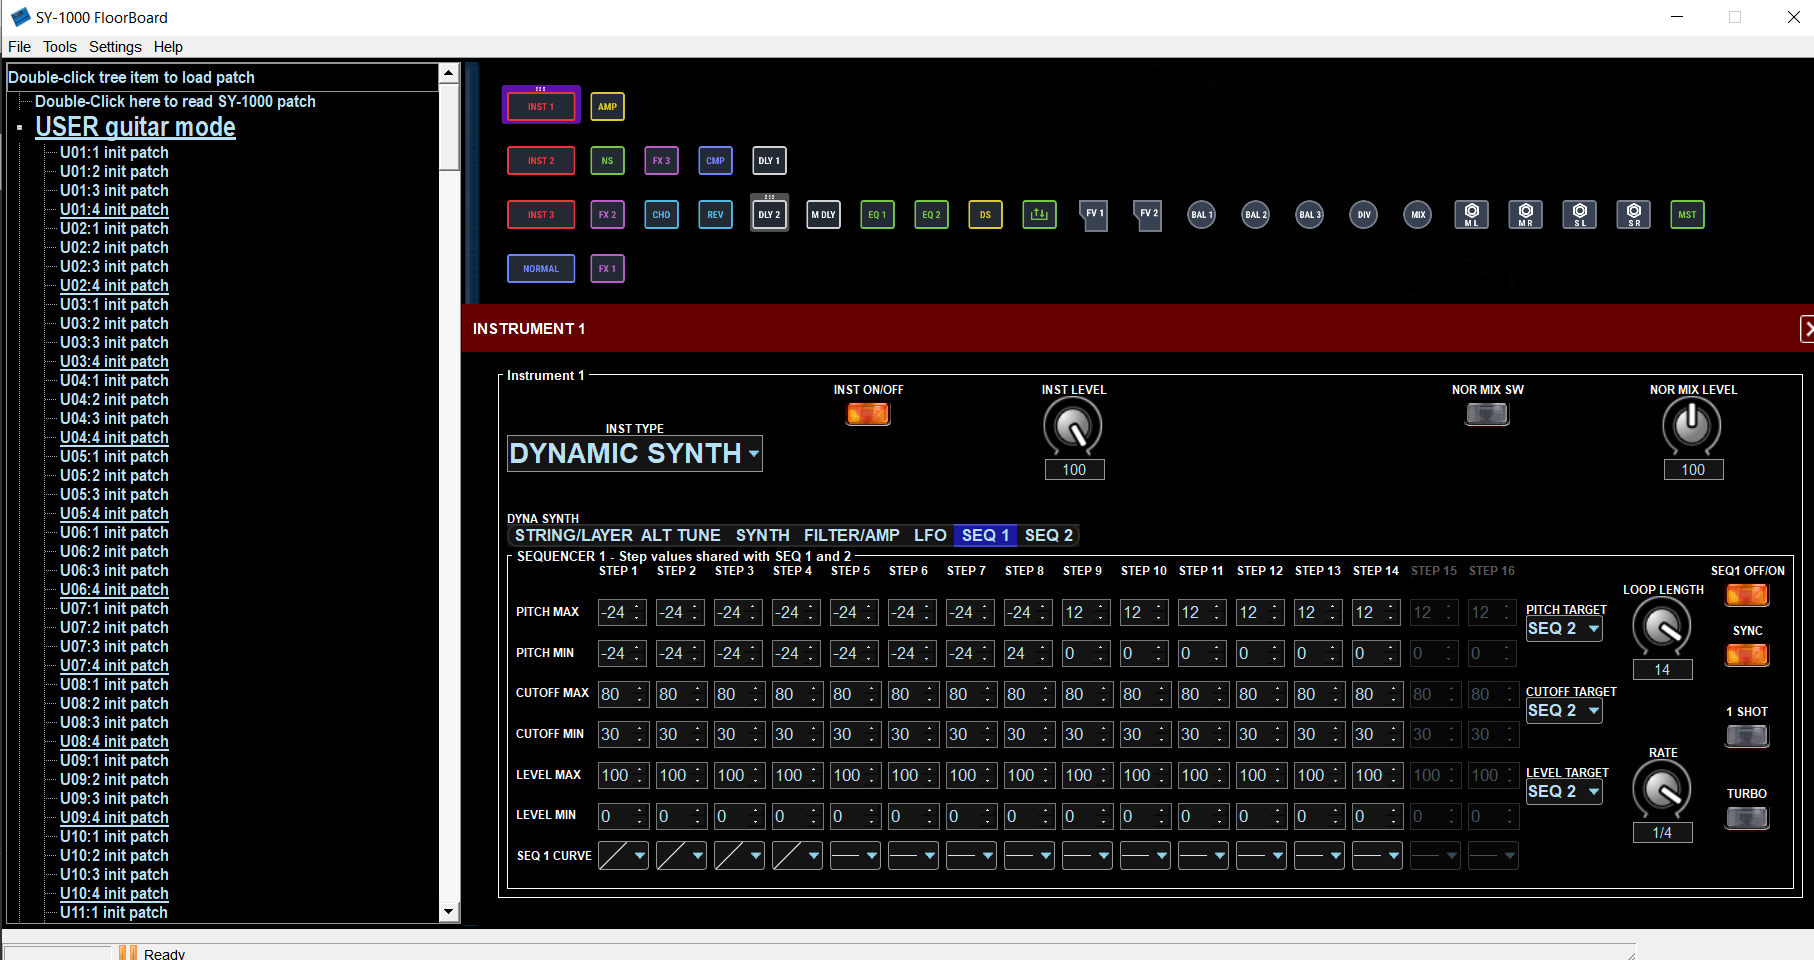
A collection of graphical midi based editors, each made specifically for the BOSS SY-1000 , Roland VG-99 guitar, or VB-99 bass synth units, which provide an alternative to the Boss or Roland version of midi editors, with full features and control of the SY-1000, VG-99, or VB-99 from a Windows, Mac, or Linux computer.
Features:
Midi editing of parameters on-line or off-line, text list generation of settings, file load/save/backup/restore, ease of use with graphical interface.
A different version specific for each device.
SY-1000FloorBoard version also has features to convert patches from VG-99,VB-99, GP-10, GT-1000 units.
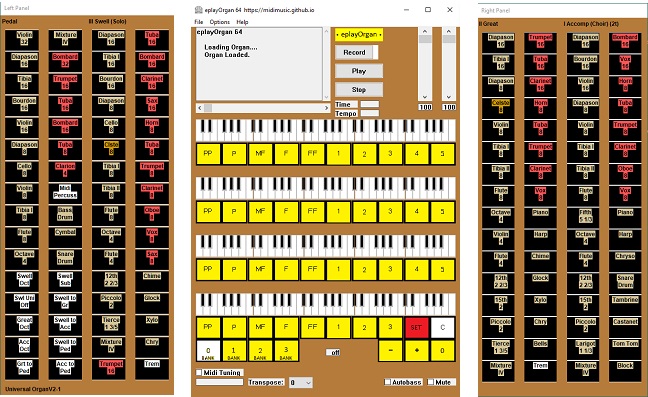
Midimusic provides archives of Wurlitzer and Estey music rolls in e-roll format. These are downloadable and the music can be played using eplayOrgan. An archive of Miditzer organ midi files is also provided.
All features of the original e-rolls and midis are available including stops and swell.
eplayOrgan is a fully featured organ which can also be played from a full midified console or standard midi keyboards. Stops may be set using a touch screen.
eplayOrgan operates under Windows. Mac and Linux are supported under Wine. The programs work just the same under Wine on Mac and Linux as they do under Windows.
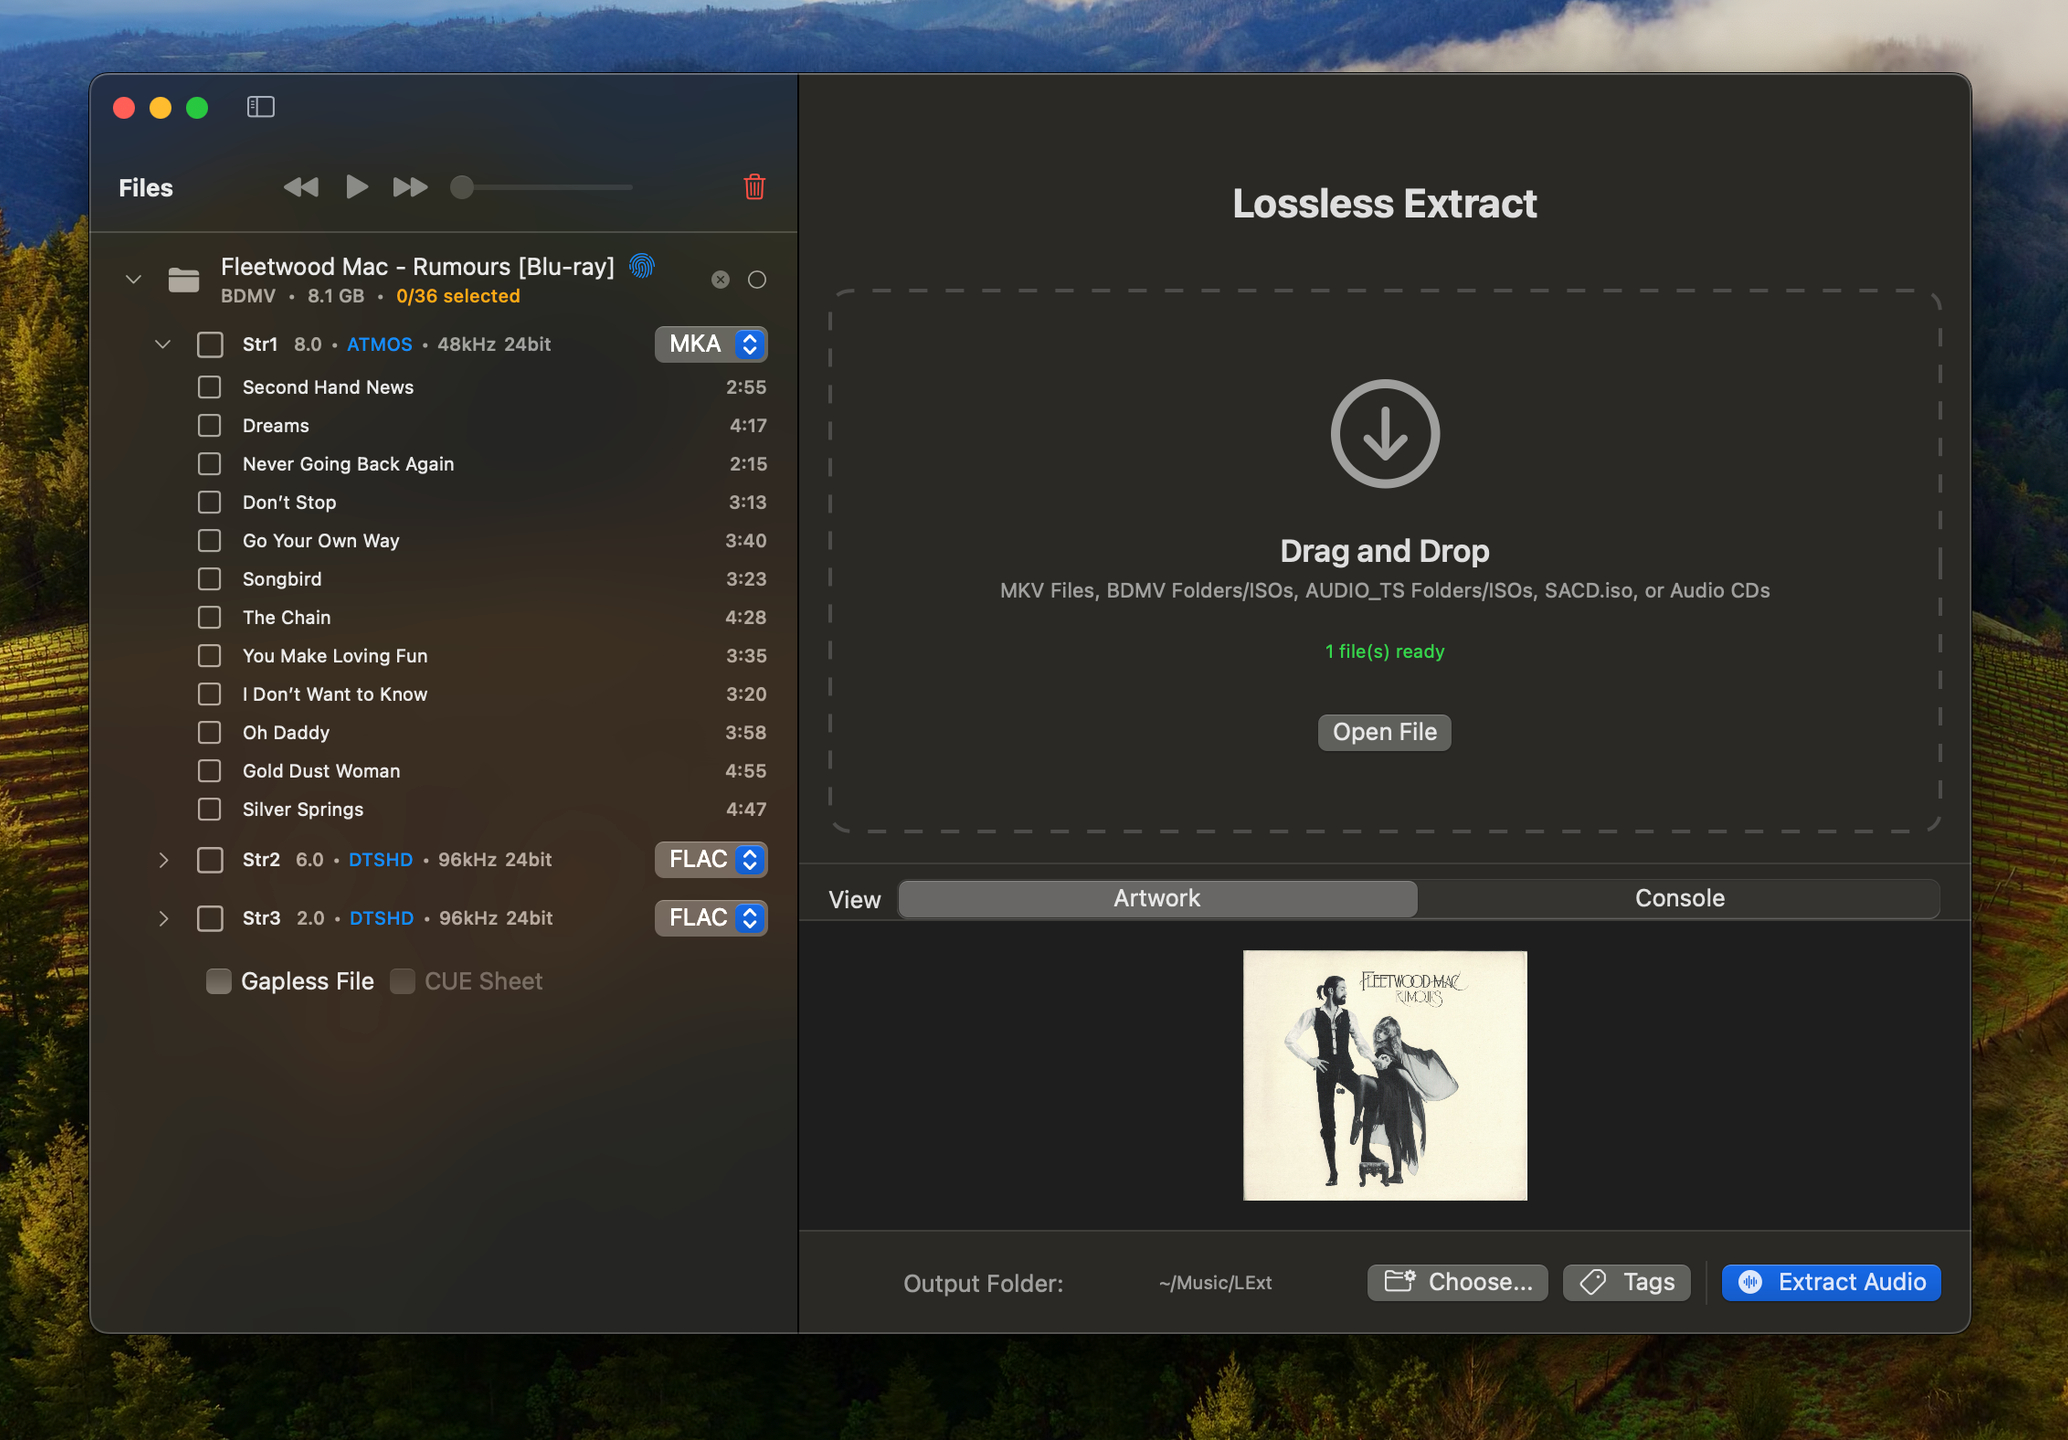
Lossless Extract for macOS and Windows is a tool for purists who demand perfect audio preservation. Designed for precision and simplicity, it effortlessly extracts high-resolution audio from Blu-ray, SACD, MKV or DVD=Audio sources. It handles Dolby TrueHD (with Atmos) and DTS-HD Master Audio preserving atmos object based meta data. Many tools decode immersive audio into PCM, which permanently destroys spatial metadata. Lossless Extract preserves the original audio stream so the immersive mix plays correctly on compatible AVRs and streaming devices.
Accepts MKV, BLU-Ray BDMV, and DVD-AUDIO ISO, AUDIO_TS folders, and SACD.isos as input files. Choose your preferred output format—FLAC , MKA, M4A, DSF, DFF, or Direct stream copy and Lossless Extract will deliver pristine, bit-for-bit copies of your original audio streams. Whether you’re archiving your home theater collection or preparing high-end audio projects, Lossless Extract ensures every detail is preserved, every time.
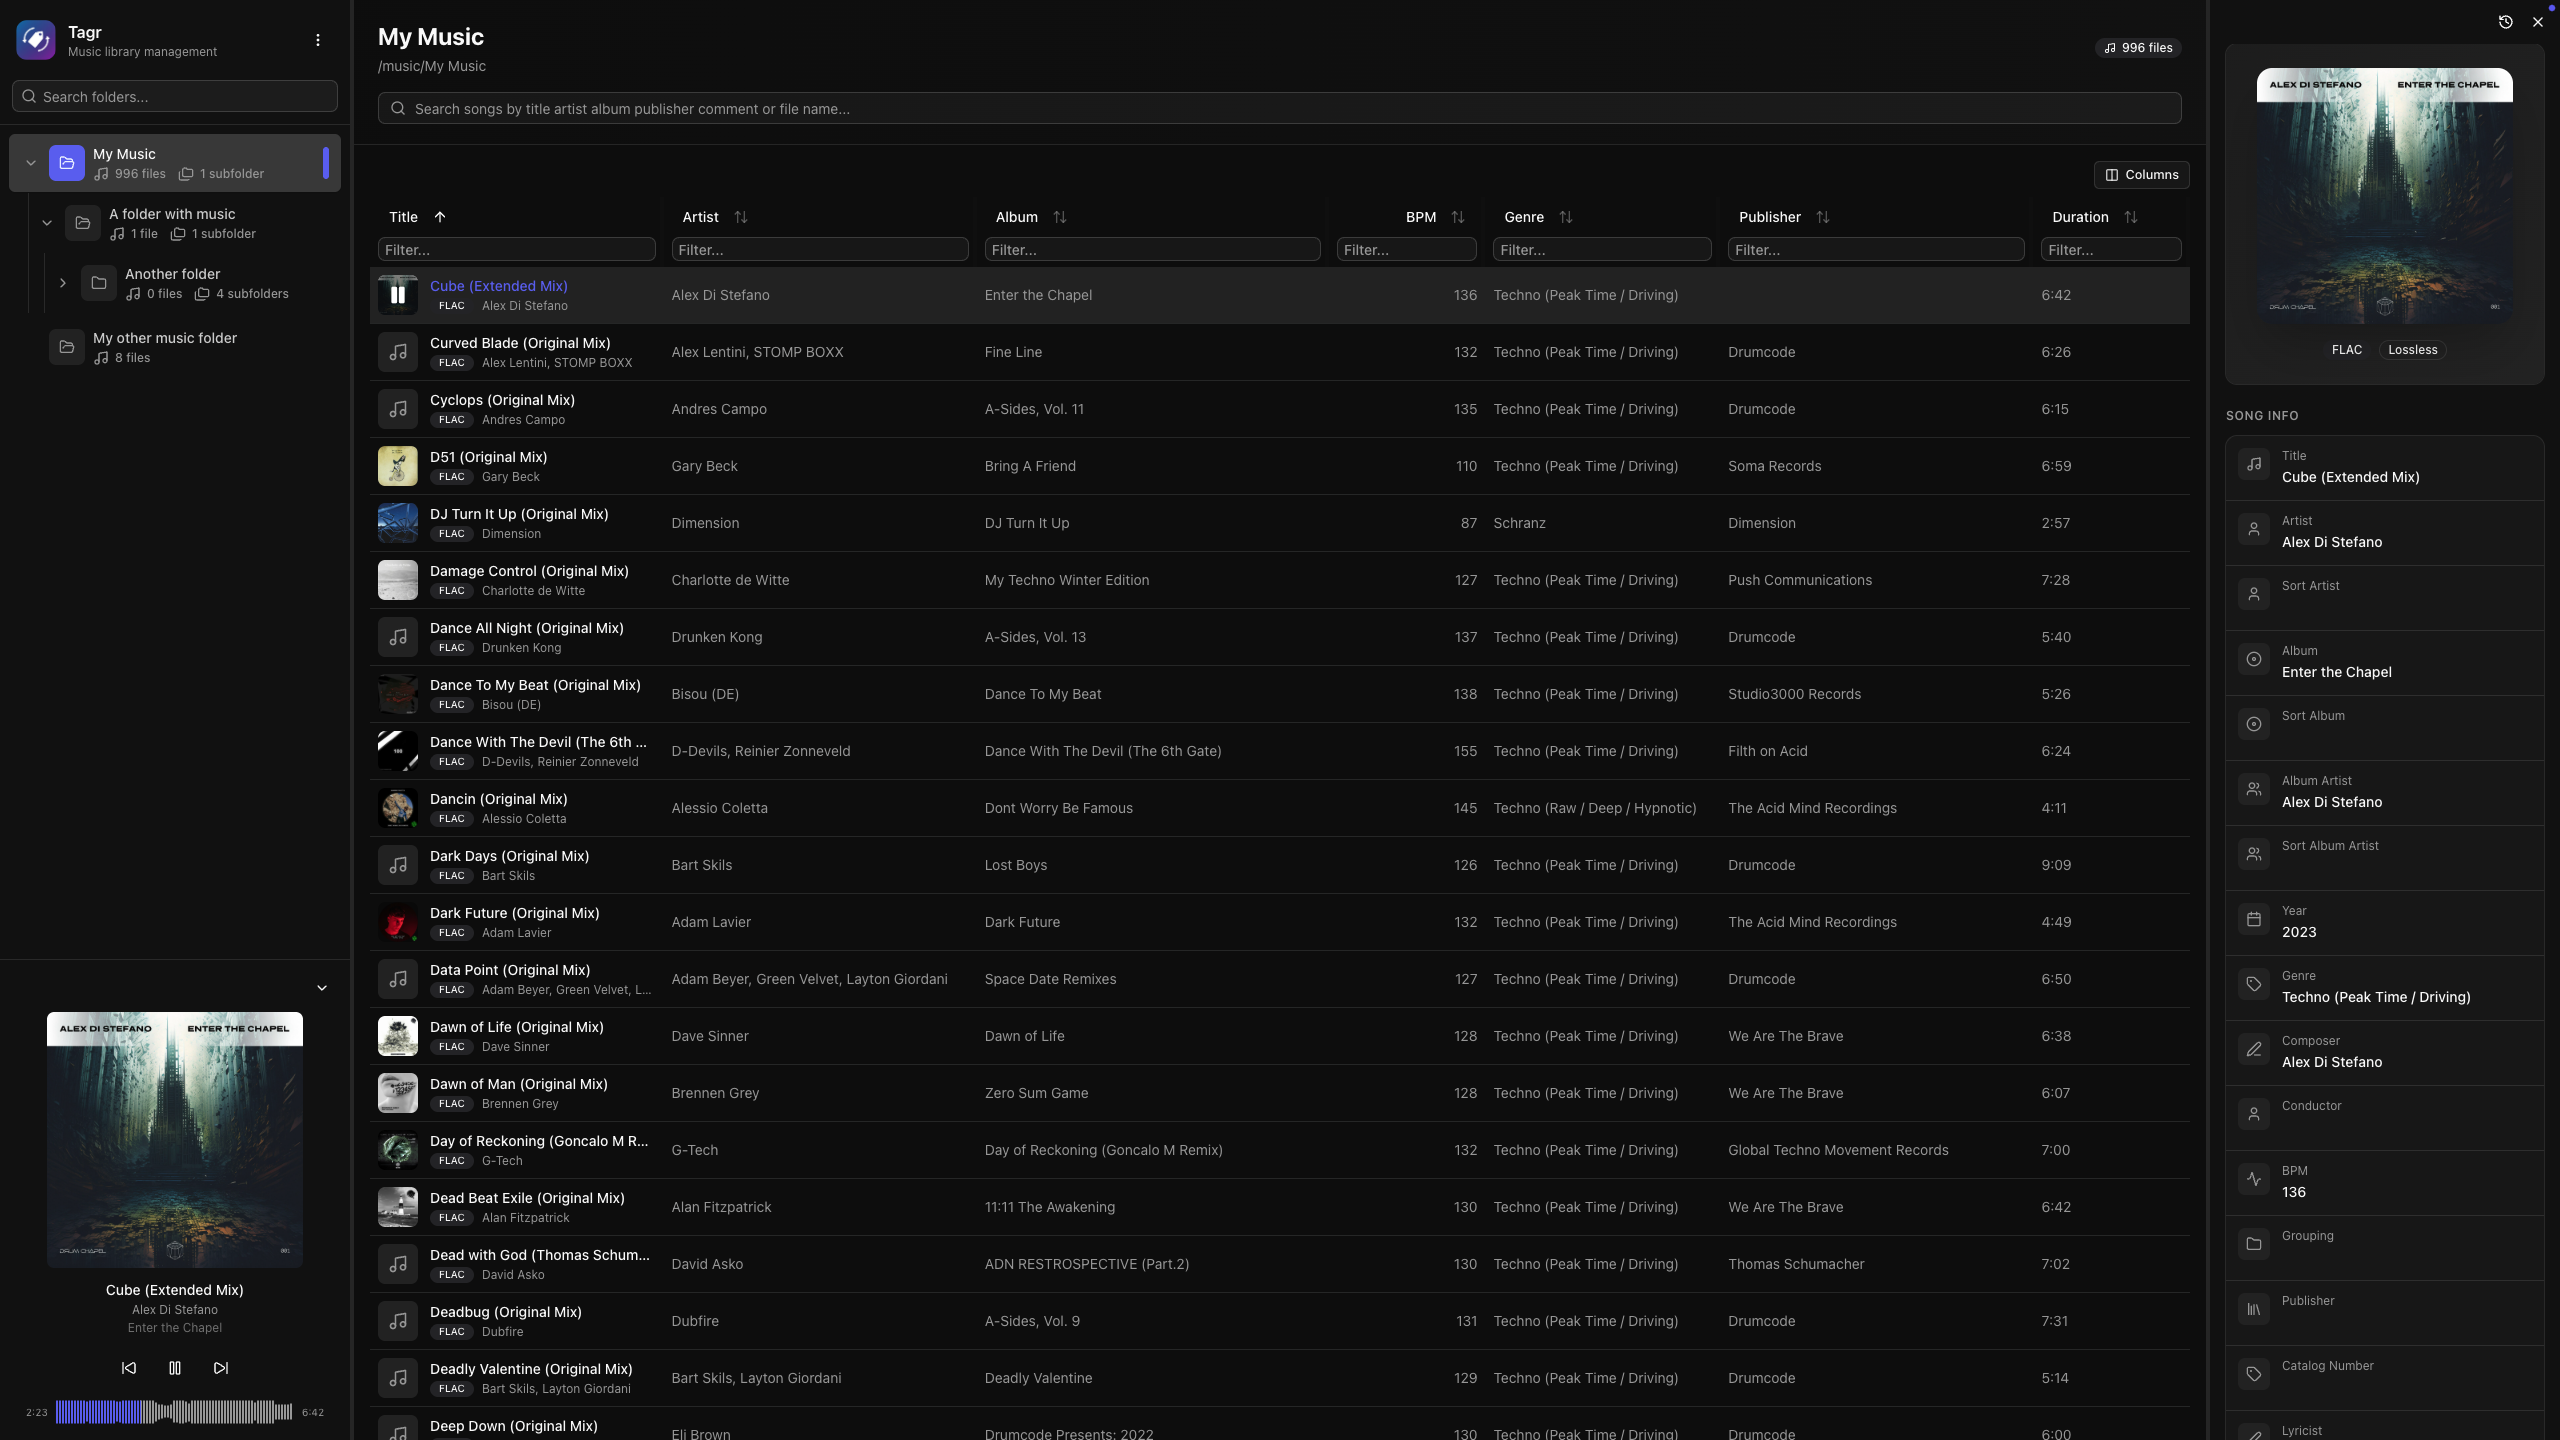
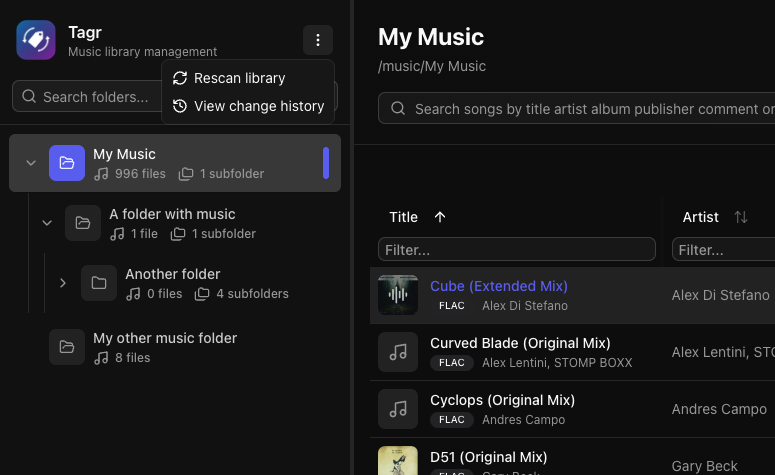
Self-hosted web app for browsing, playing, and editing music file metadata. Features a three-panel UI to navigate your library, listen to tracks, and write tag changes directly back to audio files. Built with Next.js, React, Prisma + SQLite, and node-taglib-sharp.
Most metadata editors are either desktop-only, command-line tools, or bloated apps with steep learning curves. If your music lives on a NAS, a server, or a headless machine, editing tags means SSH, mounting drives, or syncing files back and forth.
Tagr takes a different approach:
Run it anywhere — Docker, bare metal, your NAS. If it runs Node.js, it runs Tagr.
Edit from any browser — No installs, no plugins. Just open a tab.
Do one thing well — Browse your library, edit tags, save. That’s it.
Features:
Metadata Editing
Edit 40+ metadata fields inline — title, artist, album, year, genre, composer, BPM, lyrics, and more
Album art management — view, replace, and upload cover images directly
Star ratings (1–5) with a visual widget
Support for track/disc numbering, sort fields, catalog numbers, barcodes, and extended tags
Read-only display of audio properties (codec, bitrate, sample rate, channels, bits per sample)
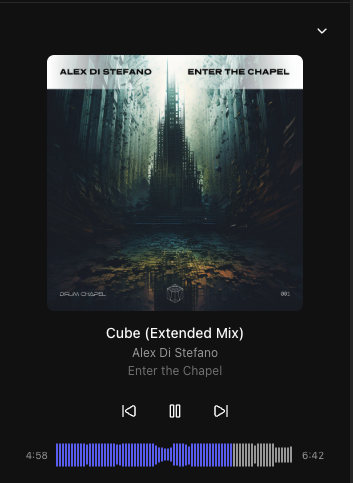
Music Player
Built-in audio player with interactive waveform visualization (WaveSurfer.js)
Play/pause, previous/next track navigation
Click-to-seek on the waveform
Auto-advance to next song
Collapsible sidebar player with album art, title, and artist display
Library Browsing
Three-panel layout — folder tree, song list, and detail editor side by side
Folder tree with hierarchical navigation and real-time search
Sorting on any column — title, artist, album, year, duration, bitrate, date added, and dozens more
Advanced filtering — text, numeric ranges, date ranges, and boolean filters across all fields
Customizable columns — show/hide any of 40+ columns to match your workflow
Virtual scrolling and infinite pagination for large libraries
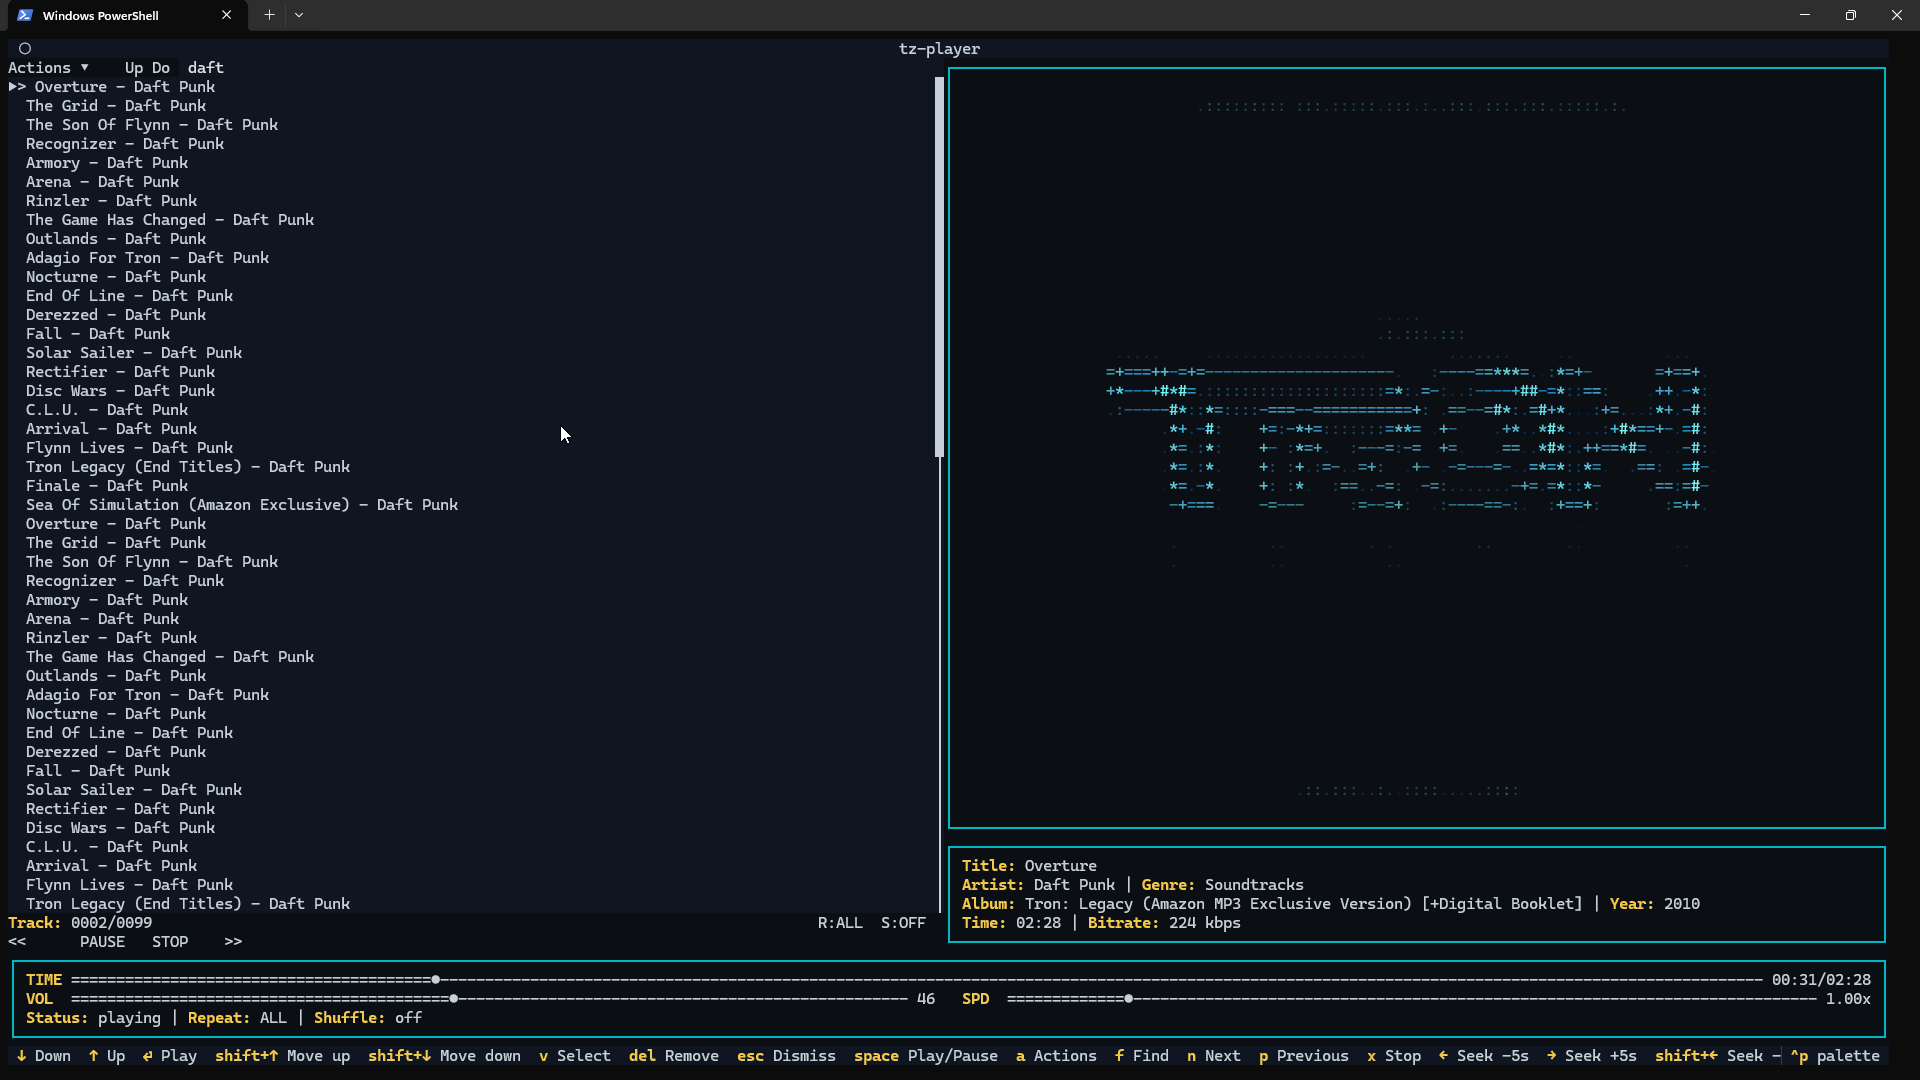
Rescrobbled is a music scrobbler daemon. It detects active media players running on D-Bus using MPRIS, automatically updates “now playing” status, and scrobbles songs to Last.fm or ListenBrainz-compatible services as they play.
Among other things, due to sharing a Spotify account, I needed a way to scrobble to Last.fm without connecting the Spotify account to my Last.fm account. Rescrobbled offers a simple solution for this.
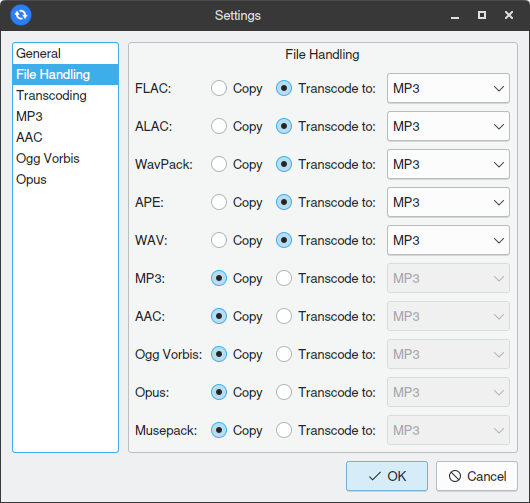
Easy Audio Sync is an audio library syncing and conversion utility. The intended use is syncing an audio library with many lossless files to a mobile device with limited storage.
The program’s design is inspired by the rsync utility. It supports folder-based source to destination syncing, with added audio transcoding capability, and is GUI-based instead of CLI-based.
Features:
Custom FFmpeg-based audio transcoding engine
Multithreaded operation for fast conversions
4 lossy output codecs supported: MP3, AAC, Ogg Vorbis, and Opus
Robust metadata parser ensures tags and cover art are correctly transferred when converting between different formats
ReplayGain volume adjustments
Destination folder cleaning (deleting files that no longer exist in the source)
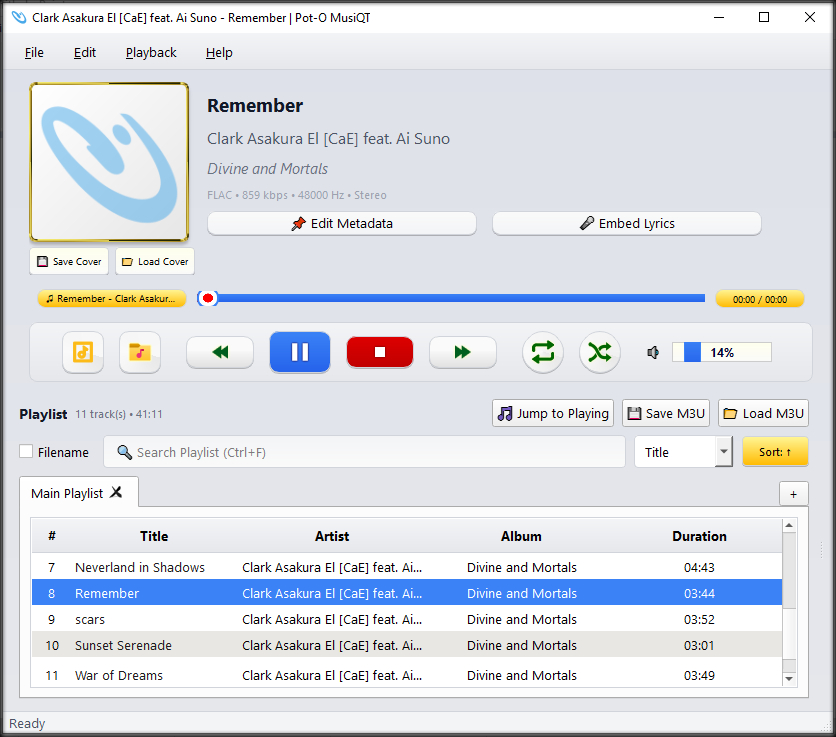
Pot-O MusiQT is a lightweight yet feature-rich desktop music player built with Python and PyQt5, designed for users who want a clean interface, strong playlist control, and practical everyday playback features without unnecessary complexity.
It focuses on local media playback, fast interaction, and keyboard-friendly operation, while still offering modern conveniences such as metadata handling, lyrics viewing, and smooth playback transitions.
Features:
JSON-backed
Edit Metadata
Embed Lyrics
Rename File by Metadata
Open ZIP File
Edit Cover
Show Lyrics
Play Video Clip
Save & Load M3U Playlist
Export Playlist to CSV & JSON
Search result as new playlist
Multiple Instances
User friendly UI/UX
Search by Metadata & Filename
Support common popular audio files (e.g. MP3, FLAC, AAC, M4V, OGG) and many more