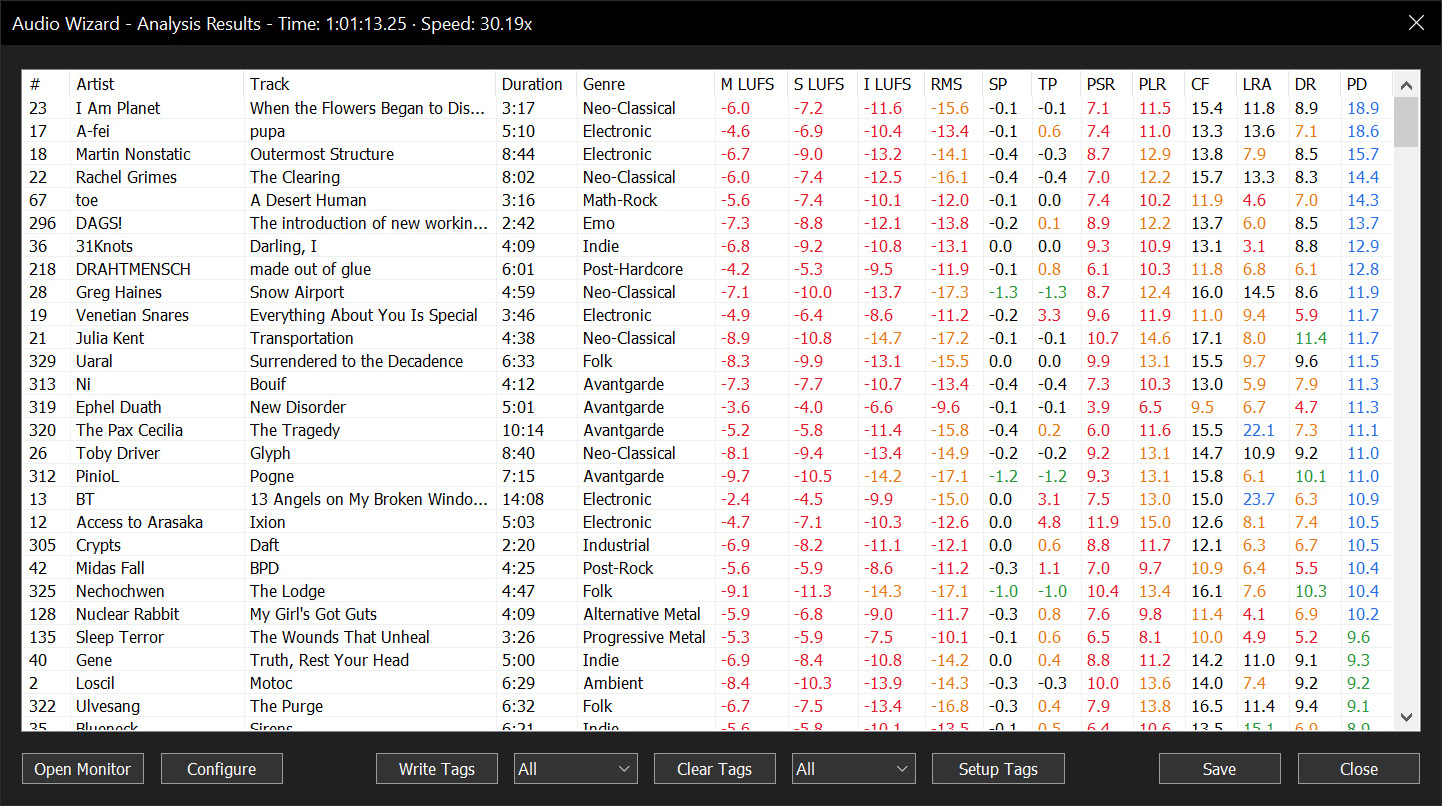
foo_truepeak is a ITU-R BS.1770-5 compliant True Peak scanner. It can also scan ReplayGain, Loudness Range (LRA), Dynamic Range (DR), show the amount of clipping samples and report the position of highest peak.
For users primarily concerned with playback quality and simplicity, foo_truepeak can replace foobar2000’s ReplayGain and DR scanners. It uses modern loudness standards, detects true peaks and can write all relevant tags in a single pass. While its ReplayGain and DR values may not exactly match legacy scanners, they are more appropriate for real-world playback on modern systems.
In foobar2000, open File → Preferences → Components.
Click Install…, select the foo_truepeak.fb2k-component file.
Restart foobar2000 when prompted.
2. Disabling legacy scanners (optional but recommended)
To avoid confusion or duplicate workflows:
Don’t try removing the ReplayGain scanner as it’s built in.
You can uninstall foo_dr_meter and or foo_dynamic_meter.
This keeps foo_truepeak as your single analysis tool.
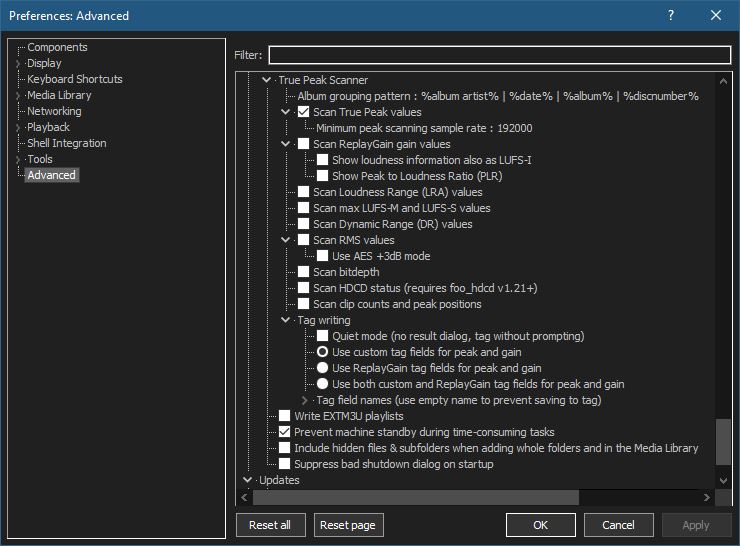
3. Open foo_truepeak preferences
Go to File → Preferences → Advanced →Tools → True Peak Scanner
4. Ensure the following is enabled
✔ Scan True Peak Values
True peak scanning accounts for inter-sample peaks created during digital-to-analog conversion, ensuring that peak levels reflect what a real DAC actually outputs, not just what is stored in the file.
5. Enable ReplayGain scanning
✔ Scan ReplayGain values
Notes:
Gains are derived from EBU R128 loudness, but written as ReplayGain tags.
Peaks are true peaks, not simple sample peaks.
Playback normalization works normally in foobar2000.
6. Enable Dynamic Range scanning
✔ Scan Dynamic Range (DR) values
Notes:
These values are analytical, not official TT DR Meter values.
They are suitable for comparison within your library, not for DR Database submissions.
7. Choose tag writing behavior
✔ Use ReplayGain tag fields for peak and gain
8. Run a True Peak scan
Select a track, tracks or albums in a playlist.
Right-click → True Peak Scan.
You can also create custom buttons on the toolbar for Album or Track scans.
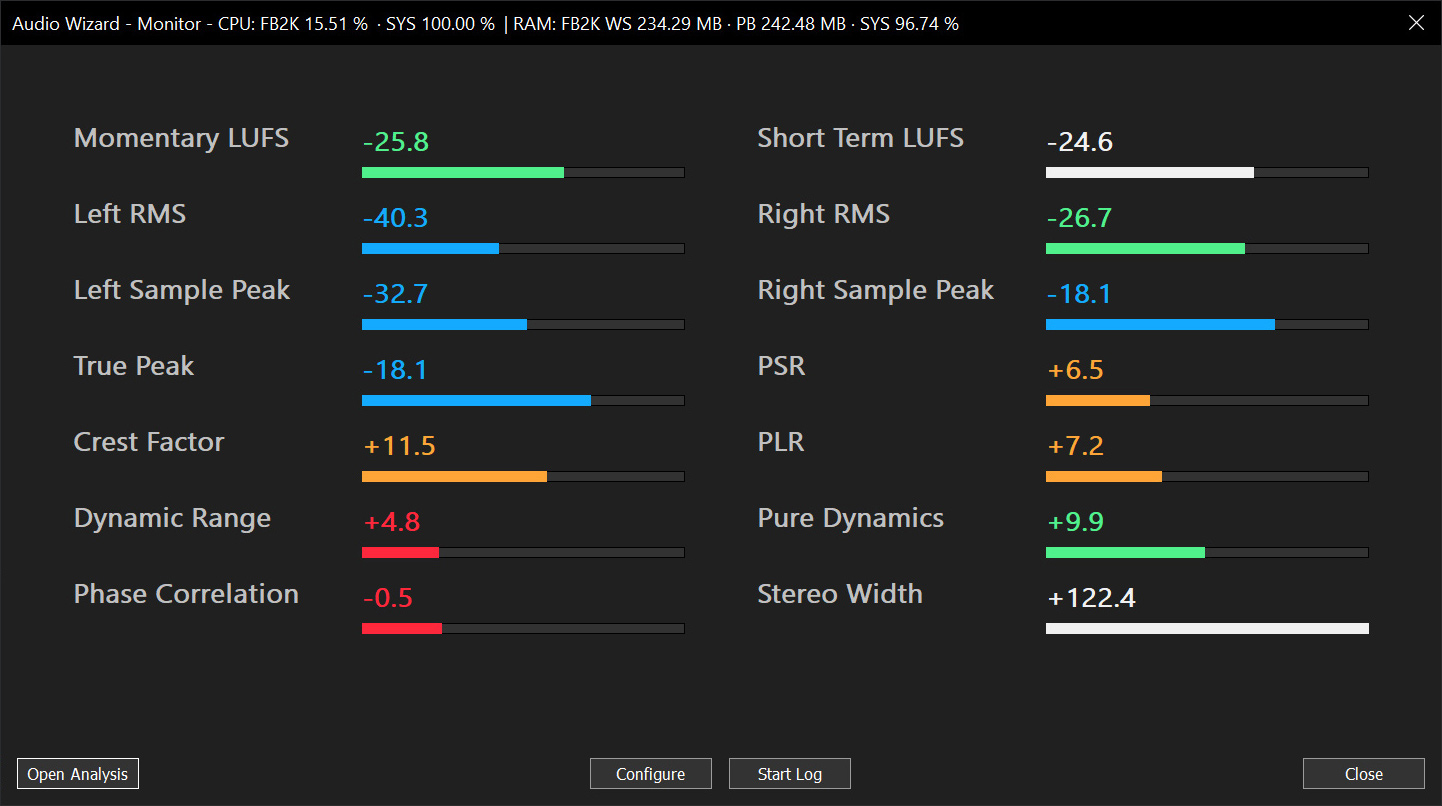
Audio Wizard (foo_audio_wizard) is a fiery chapter of The Wizardium, granting foobar2000 audiophiles and engineers tools for full-track analysis and real-time monitoring. Harness Pure Dynamics for psychoacoustic clarity.
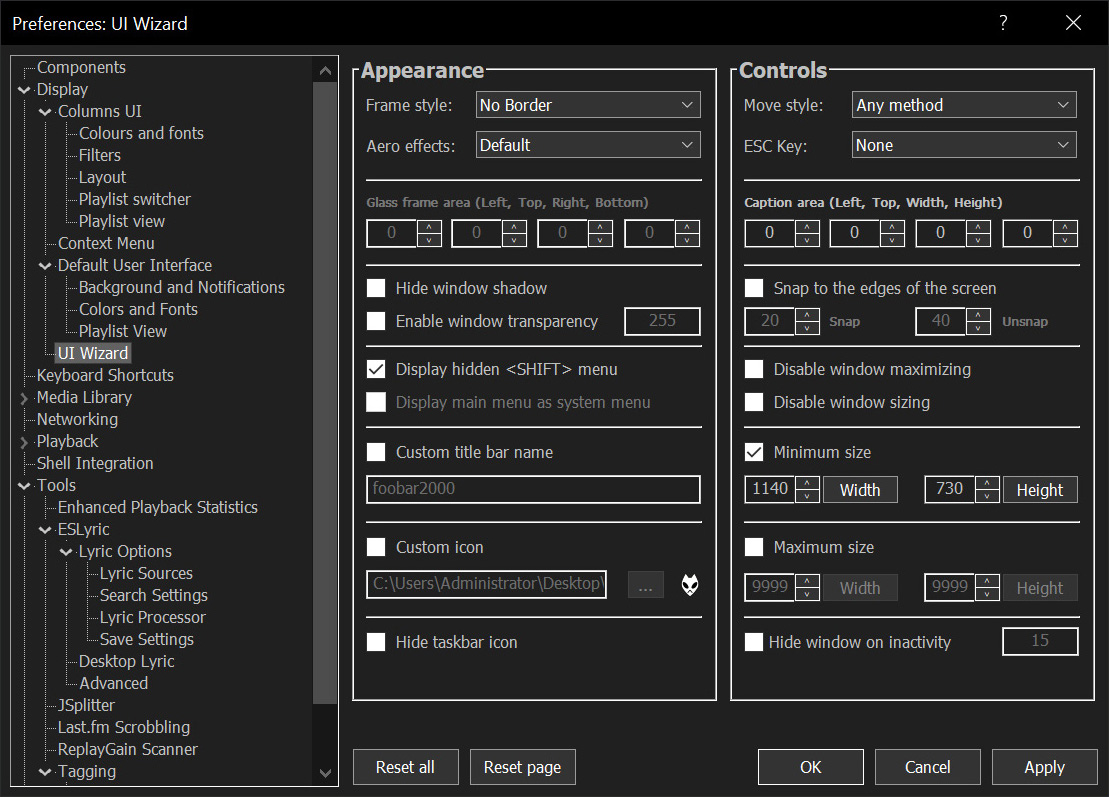
Sealed within the luminous Sapphiraz Sanctum, where ethereal interfaces shimmer in eternal twilight, the UI Wizard is a spellbinding chapter of The Wizardium’s grimoire. Its runic seal, the radiant ᛋ Sowilo, yields only to masters of window enchantment, reshaping foobar2000’s form with mischievous elegance — from glass-like Aero effects to borderless designs that defy mortal UI constraints.
Window Appearance Customization:
Supports multiple frame styles: Default, Small Caption, No Caption, No Border.
Configurable Aero effects: Default, Disabled, Glass Frame, Sheet of Glass.
Customizable window background color and transparency.
Optional custom window title and icon.
Configurable window shadow for borderless styles.
Window Behavior Control:
Adjustable window positioning and sizing with constraints (min/max width and height).
Customizable caption area for dragging with various move styles (e.g., mouse buttons, key combinations).
Snap-to-edge functionality with configurable snap and unsnap distances.
ESC key actions: None, Hide, or Exit.
Inactivity-based window hiding with customizable timeout.
Window State Management:
Toggle between Normal, Maximized, and Fullscreen states.
Option to disable window maximizing or resizing.
Automatic saving and loading of window position and size.
API: COM/ActiveX interface for scripting in foobar2000 via Spider Monkey Panel or JSplitter.
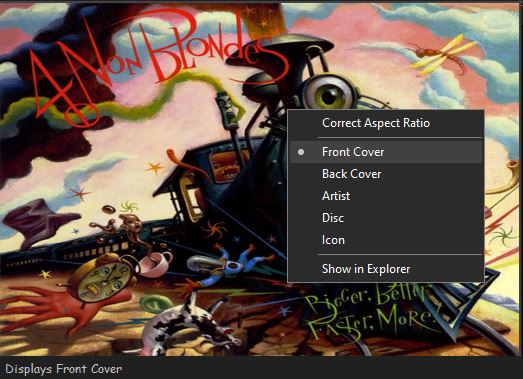
Foobar2000 displays artwork in a panel which can be added and configured to suit your preferences. The artwork panel displays the image file associated with an audio track. If the standard options are insufficient, Foobar’s image handling can be extended via additional components.
To add an artwork panel to the default user interface (DUI), Enable Layout Editing Mode from the menu View > Layout. Add the Album Art Viewer from the Selection Information section.
Selecting the Album Art Viewer on the Add New UI Element menu
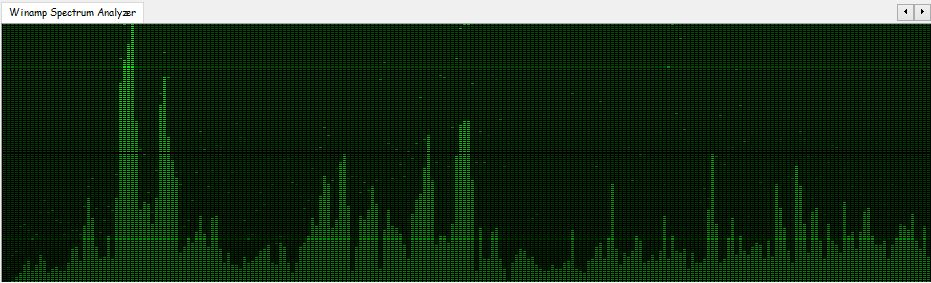
foo_vis_wispan is a Foobar2000 spectrum analyzer visualization implemented with GDI. It is a port of the Classic Spectrum Analyzer (vis_classic) Winamp visualization plug-in by Mike Lynch.
The foo_outinfo component exposes information about the current audio output and signal, such as the active output device, sample rate, bit depth, and channel count. These fields are especially useful in the status bar, where you want quick technical confirmation without cluttering playlists.
A simple and practical example is:
Now Playing: %artist% - %title% | %output_samplerate% Hz / %output_bitdepth% bit
What This Displays
When a track is playing, the status bar would show something like:
Now Playing: Miles Davis - So What | 44100 Hz / 16 bit
This tells you at a glance:
What is playing
The actual output sample rate
The output bit depth being sent to your audio device
Step By Step Explanation:
Music Metadata (Standard Fields)
%artist% - %title%
%artist% → Track artist tag
%title% → Track title tag
These are standard foobar2000 title formatting fields and work everywhere.
Separator
|
This is just plain text. It visually separates the music info from the technical output info. You can replace it with a dash, bullet, or brackets if you prefer.
foo_outinfo Output Fields
%output_samplerate%
Displays the actual output sample rate in Hertz
Reflects resampling, DSP changes, or output driver behavior
This is more reliable than %samplerate% when DSPs are active
%output_bitdepth%
Displays the bit depth used by the output
Shows what is being sent to the DAC, not just what is in the file
More Informative Versions
If you want to include channels and output device name:
Now Playing: %artist% - %title% | %output_samplerate% Hz / %output_bitdepth% bit / %output_channels% channels
Displays:
Now Playing: Aphex Twin - Xtal | 48000 Hz / 24 bit / 2 channels
If you want to add the current Replaygain mode:
Now Playing: %artist% - %title% | %output_samplerate% Hz / %output_bitdepth% bit / %output_channels% channels | RG %output_rg_source%
Displays:
Now Playing: Aphex Twin - Xtal | 48000 Hz / 24 bit / 2 channels | RG Album
If you want to display the active DSP
$if(%output_dsp%, | DSP: %output_dsp%)
Displays the separator and active DSP, otherwise displays nothing:
| DSP: Resampler (SoX)
Minimal Technical Version (Very Clean)
For users who want only output confirmation:
Output: %output_samplerate% Hz / %output_bitdepth% bit
Displays:
Output: 96000 Hz / 24 bit
Why Use foo_outinfo in the Status Bar?
Confirms what your DAC is actually receiving
Helps verify exclusive mode, resampling, and DSP behavior
Avoids cluttering playlists with technical data
Ideal for users who care about signal integrity but want a clean UI
Beginner Notes and Caveats
All output_* fields require foo_outinfo to be installed
These fields only show values while audio is playing
If nothing is playing, the fields will appear empty
Installing and Configuring OpenLyrics (foo_openlyrics) in foobar2000
OpenLyrics (foo_openlyrics) is the most actively maintained lyrics display component for foobar2000. It provides an integrated lyrics panel, automatic lyrics downloading, local storage, and optional editing support. This guide walks through installation, panel setup, and recommended configuration options.
Verify OpenLyrics is enabled under Preferences → Components.
Confirm the panel is visible and active.
Check that playback is active (lyrics are not fetched for stopped tracks).
Try manual search from the panel context menu.
Review source availability in the OpenLyrics preferences.
Summary
OpenLyrics is currently the most complete and actively maintained lyrics solution for foobar2000. Once installed and configured, it provides automatic lyrics retrieval, reliable local storage, and flexible display options suitable for both minimal and advanced layouts.
For new foobar2000 installations or users modernizing older setups, OpenLyrics is the recommended lyrics display component.
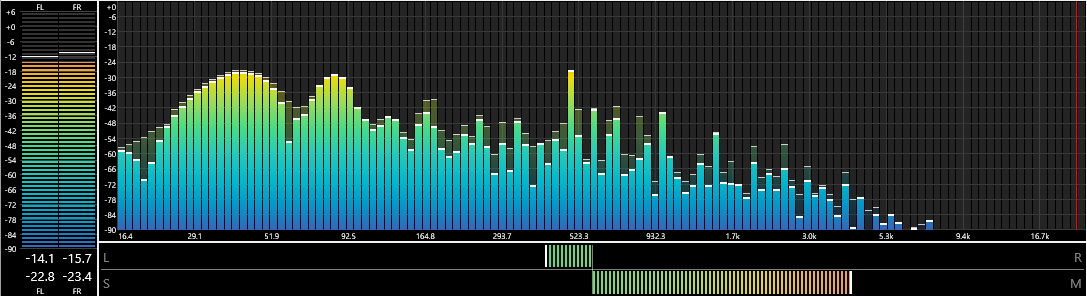
foo_vis_spectrum_analyzer is a foobar2000 component that implements a spectrum analyzer panel. It is an attempt to recreate the foo_musical_spectrum component by fismineur for foobar2000 64-bit.